Welcome to Chromatik
The Digital Lighting Workstation has arrived. We are glad that you are here and interested in exploring a new approach to animated light.
Chromatik represents a paradigm shift in lighting software, born out of a wish for lighting tools to offer the kind of power and flexibility found in modern music production software — a single environment that flows seamlessly between composition and performance, looping and improvisation, with musical interactivity, parameter-driven modulation and dynamic hands-on control.
The aim of this guide is to familiarize you with all the key concepts and functionality of Chromatik. As the software is constantly evolving, this guide will forever be a work in progress. If you need additional support, navigate to the Help page.
Download + Installation
Chromatik runs on macOS, Windows, and headless systems of all varieties.
Navigate to the Download page to find instructions on how to install and register your copy.
Guide Conventions
In this guide, the following formatting conventions are followed.
| SECTION | UI tab or section with a visible label |
| UI Feature | Area of the UI that is not labeled |
| Button in the UI | |
| Parameter | Name of a control parameter or setting |
Value |
Value of a control parameter or setting |
Computer keyboard operations are indicated as follows.
| KEY | Key on your computer keyboard |
| ⌘ | The Command modifier key on macOS, or the Control key elsewhere |
| ⇧ | The Shift modifier key |
| ⌥ | The Alt / Option modifier key |
| ⌘A | Indicates pressing A while holding the Command modifier |
After running the application for the first time, Chromatik creates a folder in your user directory where content and settings are stored by default.
- macOS:
/Users/<username>/Chromatik/ - Windows:
C:\Users\<username>\Chromatik - Linux:
~/Chromatik/
This guide refers to this directory using forward-slashes and the shorthand ~/Chromatik/.
Quick Start
-
In the left-pane, navigate to the MODEL tab. Click the button to open the Fixture Chooser. In this example we add a
Gridfixture by double-clicking or pressing the RETURN key.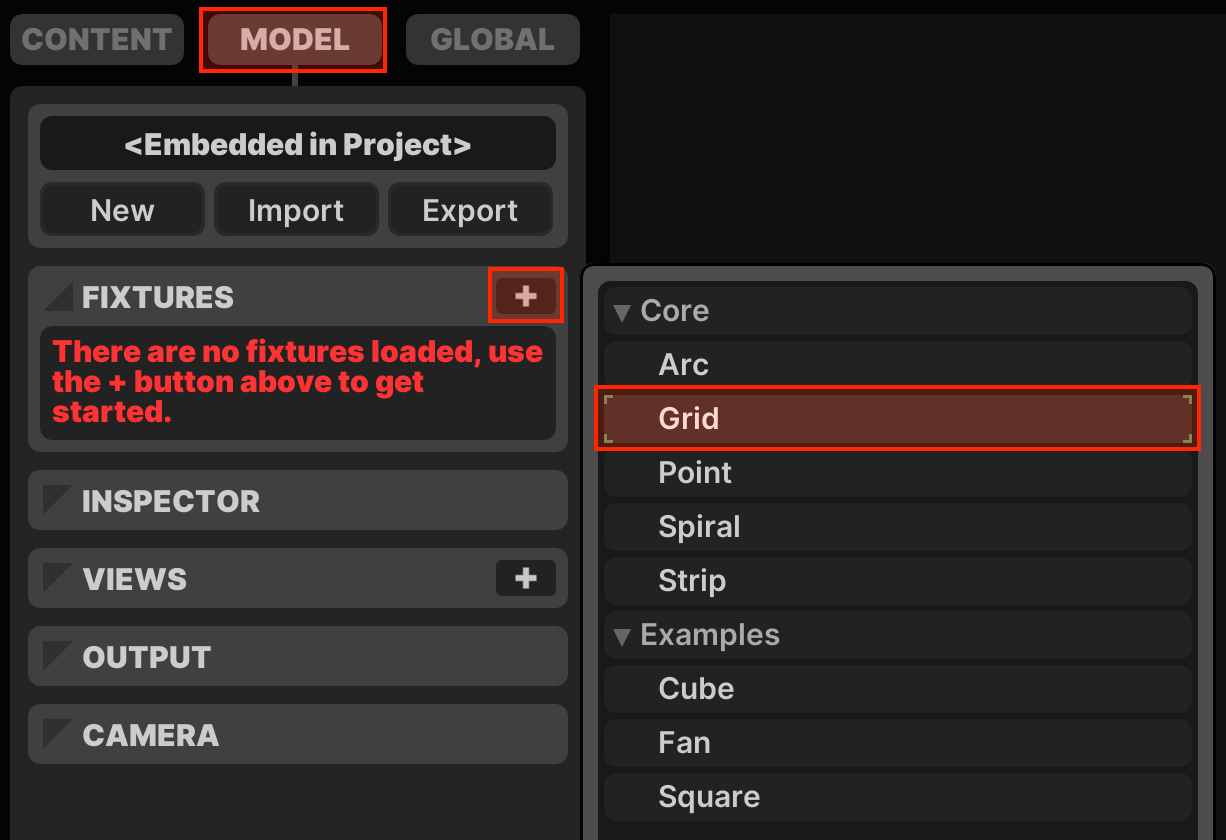
-
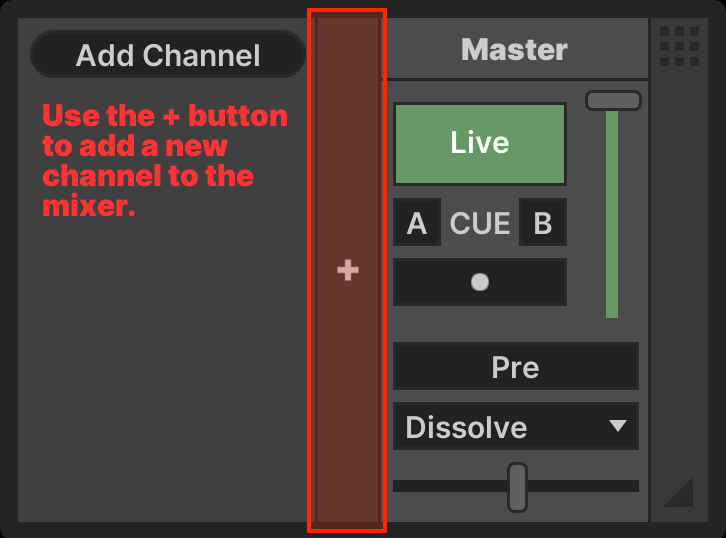
In the bottom-tray mixer section, click the strip to add a new mixer channel.
-
In the newly created channel, click the button on the channel's pattern bin to open the Device Chooser. In this example we add a
Chevronpattern by double-clicking or pressing the RETURN key.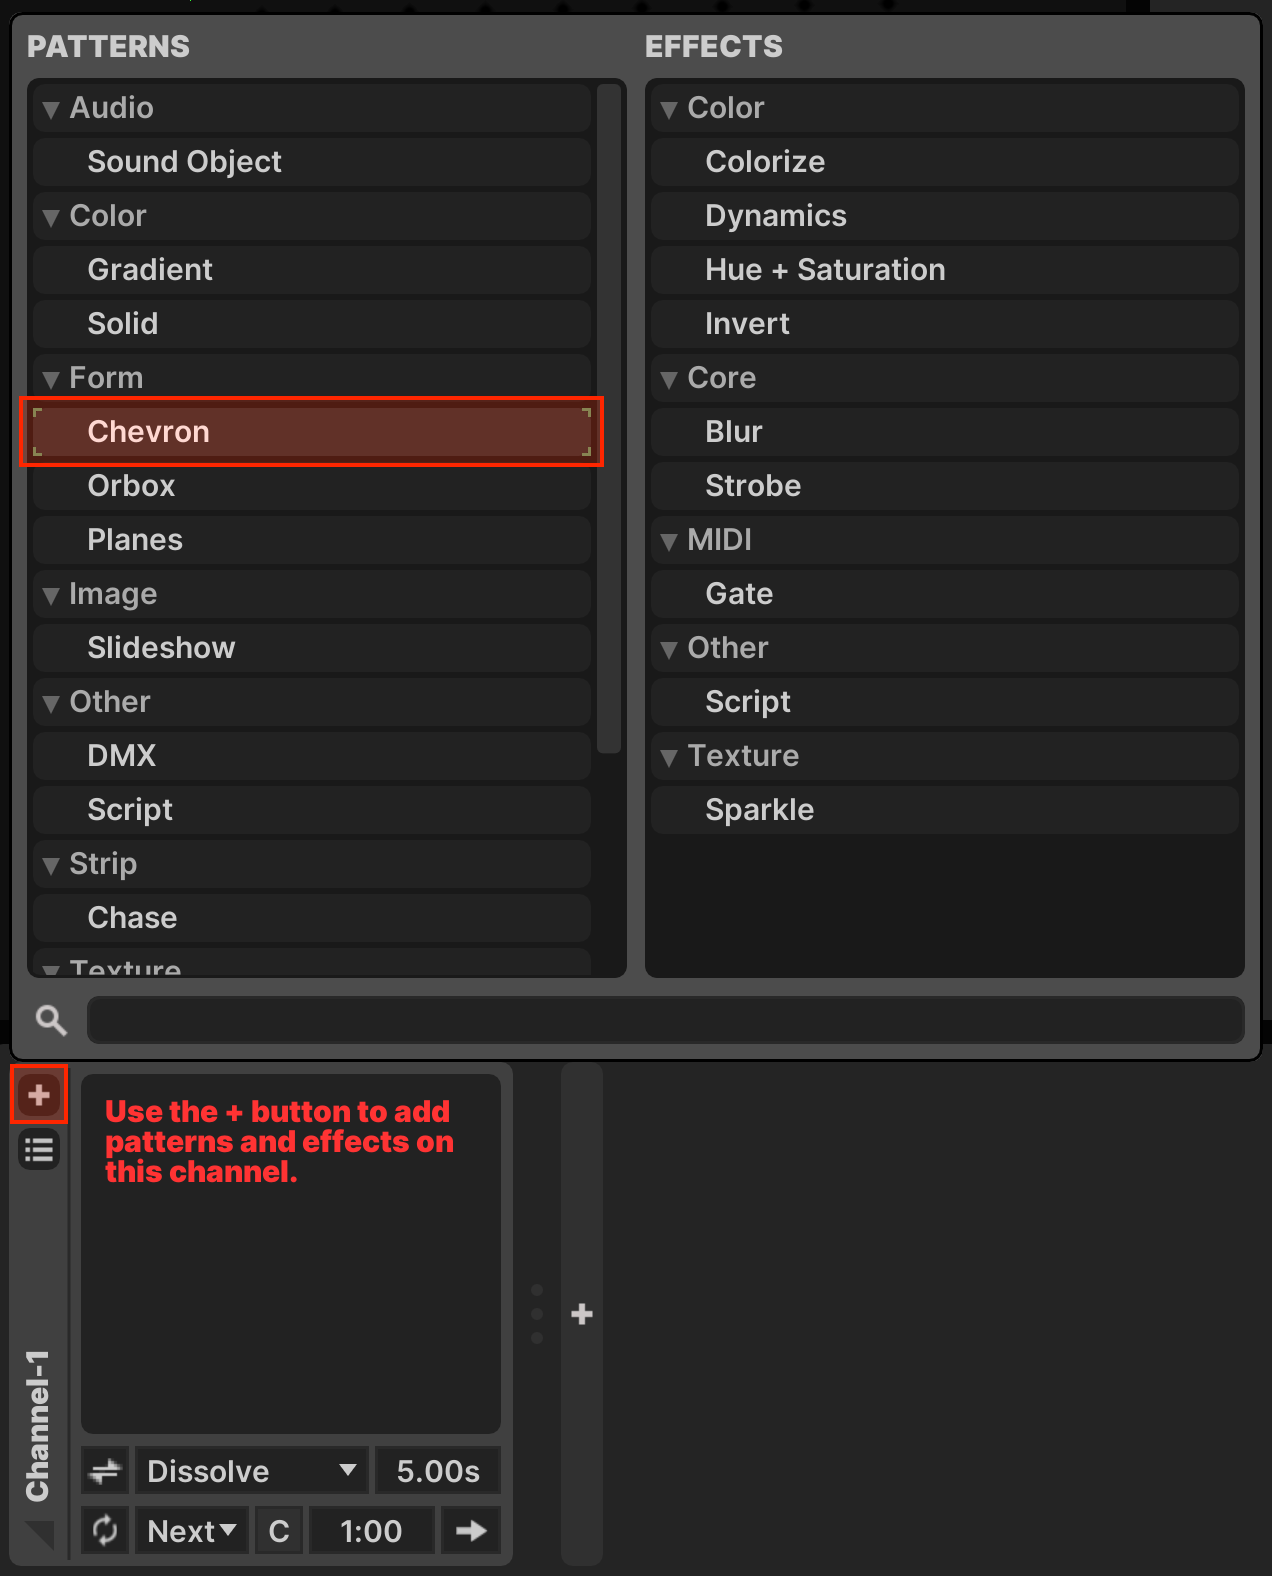
-
The pattern device is now listed in the channel's Pattern Bin, and the controls are visible in the Device Bin. The rendered output should be visible in the Preview Window. Use the controls to modify the output.
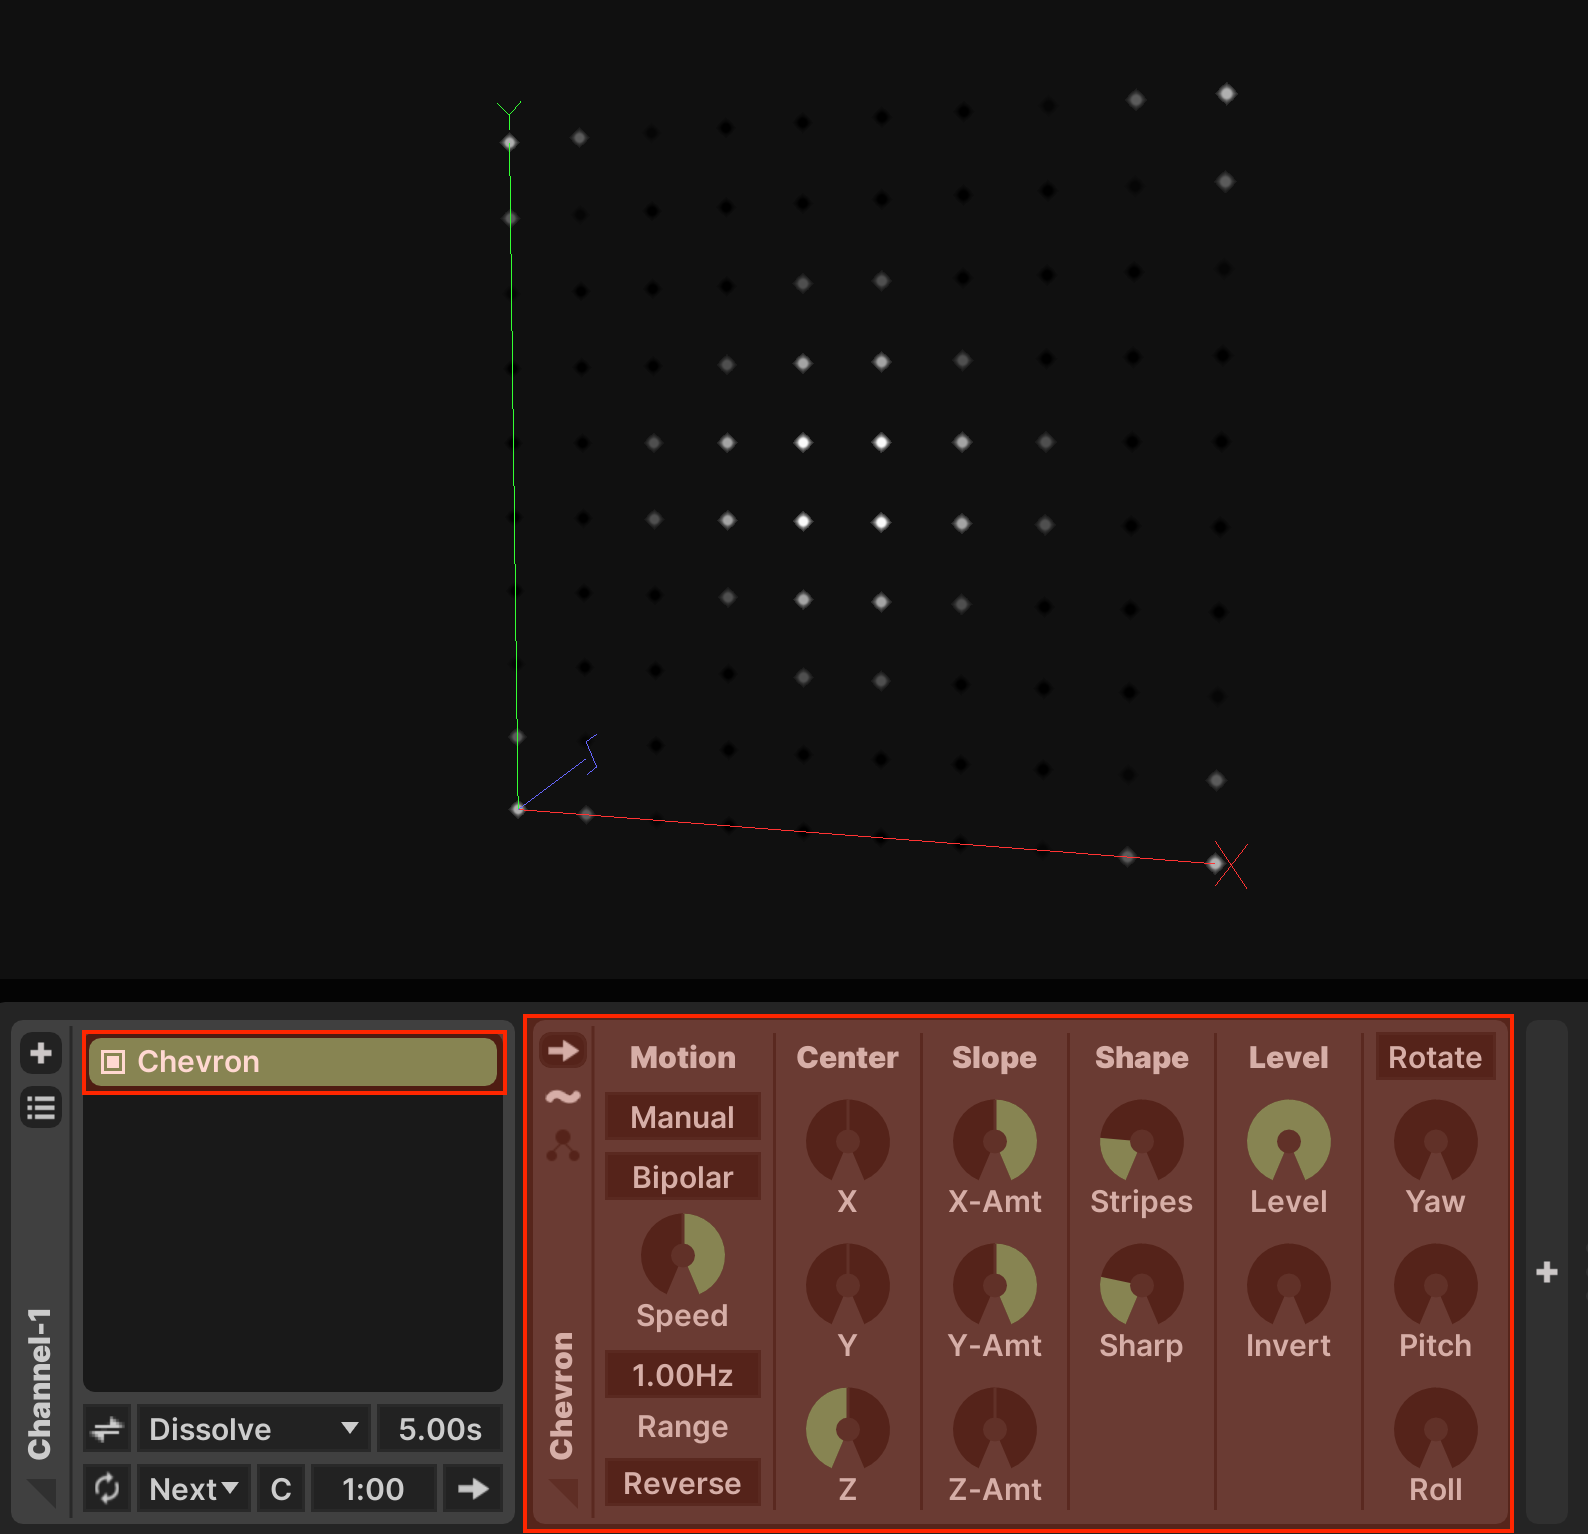
From here you may experiment with adding more patterns and effects to the channel to learn how they behave.
-
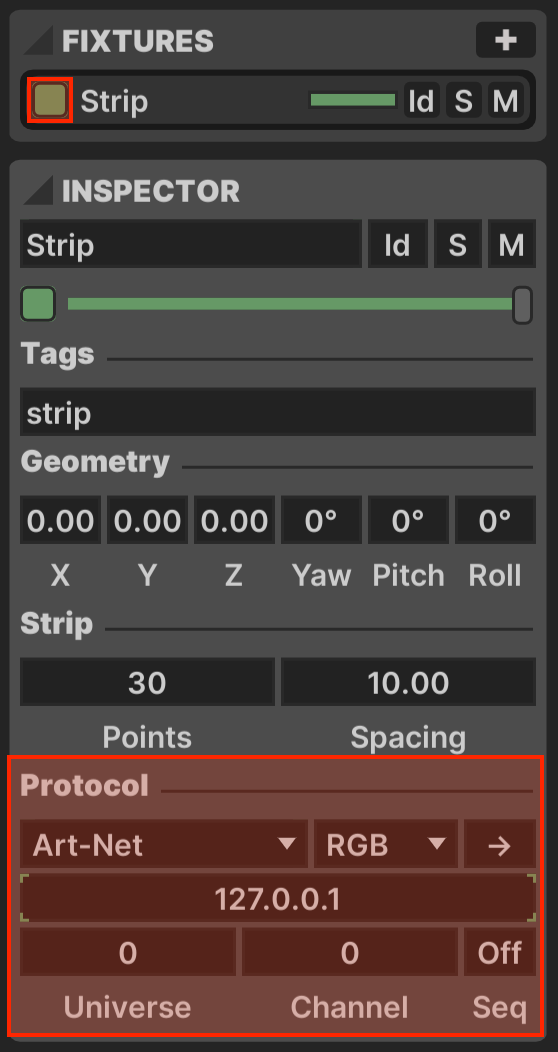
Enable an output protocol for a fixture by using the Fixture Inspector. Select the desired fixture in the FIXTURES section of the left-pane's MODEL tab. In the INSPECTOR section you can specify Protocol parameters. Click the toggle button to the left of the fixture's name to enable output.
-
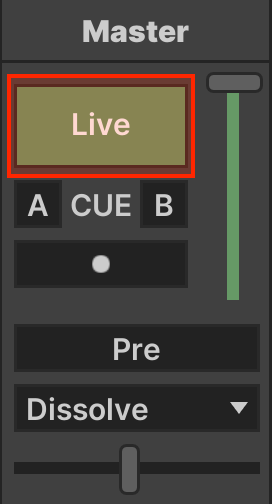
Ensure that you have the button on the Master channel in the mixer enabled to activate network output.
-
Save your work using the Project Toolbar, or at anytime by pressing ⌘S or ⇧⌘S.
