Pattern + Effect Devices
Pattern and Effect devices are the core building blocks of Chromatik's animation engine. They are modeled after the analogous concepts of Instruments and Effects in the world of music software.
- Patterns: light instruments. Generate new animated pixel-based light output.
- Effects: light effects. Given existing input pixels, modify them to create a new output.
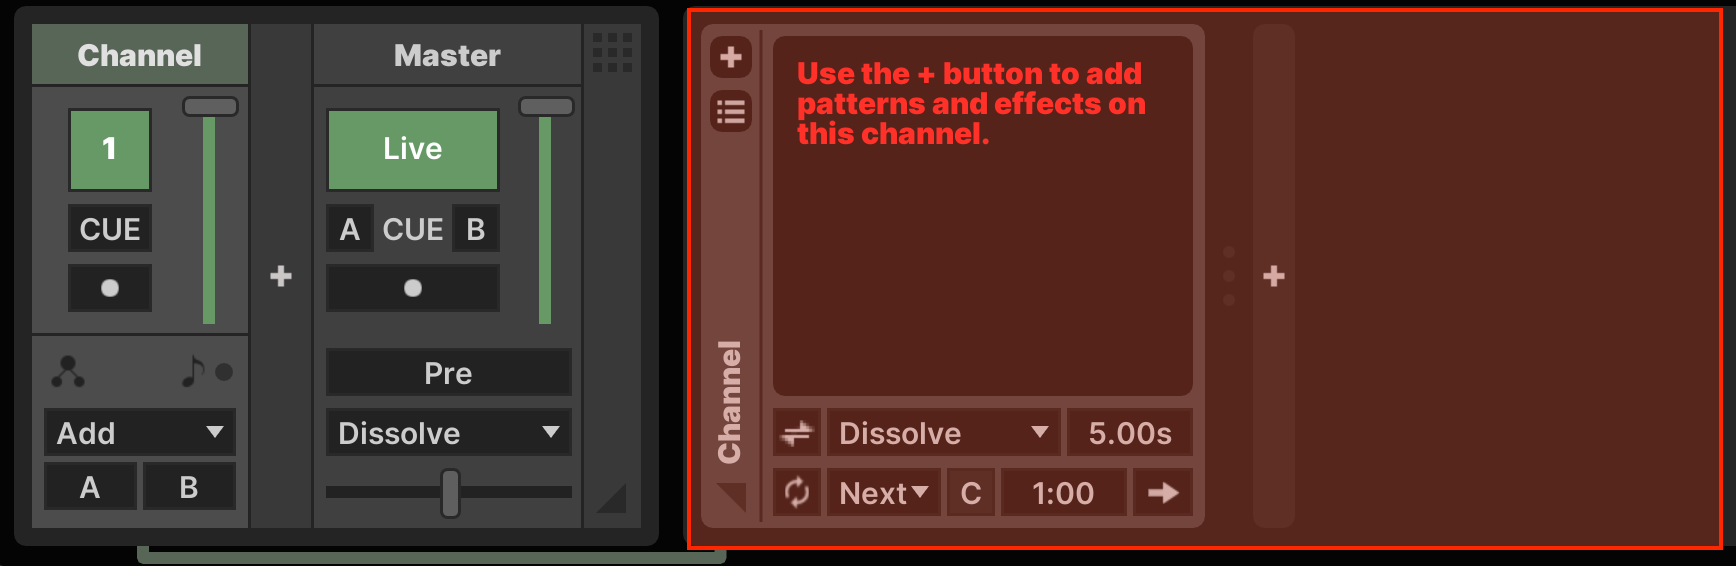
These devices are worked with in the Device Bin area of the UI, which sits directly adjacent to the Mixer. Each channel in the mixer has its own Device Bin. A green line beneath the Mixer indicates which channel currently has focus.
Patterns
Patterns are added to a channel using the Pattern Bin, which is always the component in the Device Bin on a normal channel. The name of the channel is indicated in the vertical bar on the left of the Pattern Bin. Note that there is no Pattern Bin on a Group or Master channel.
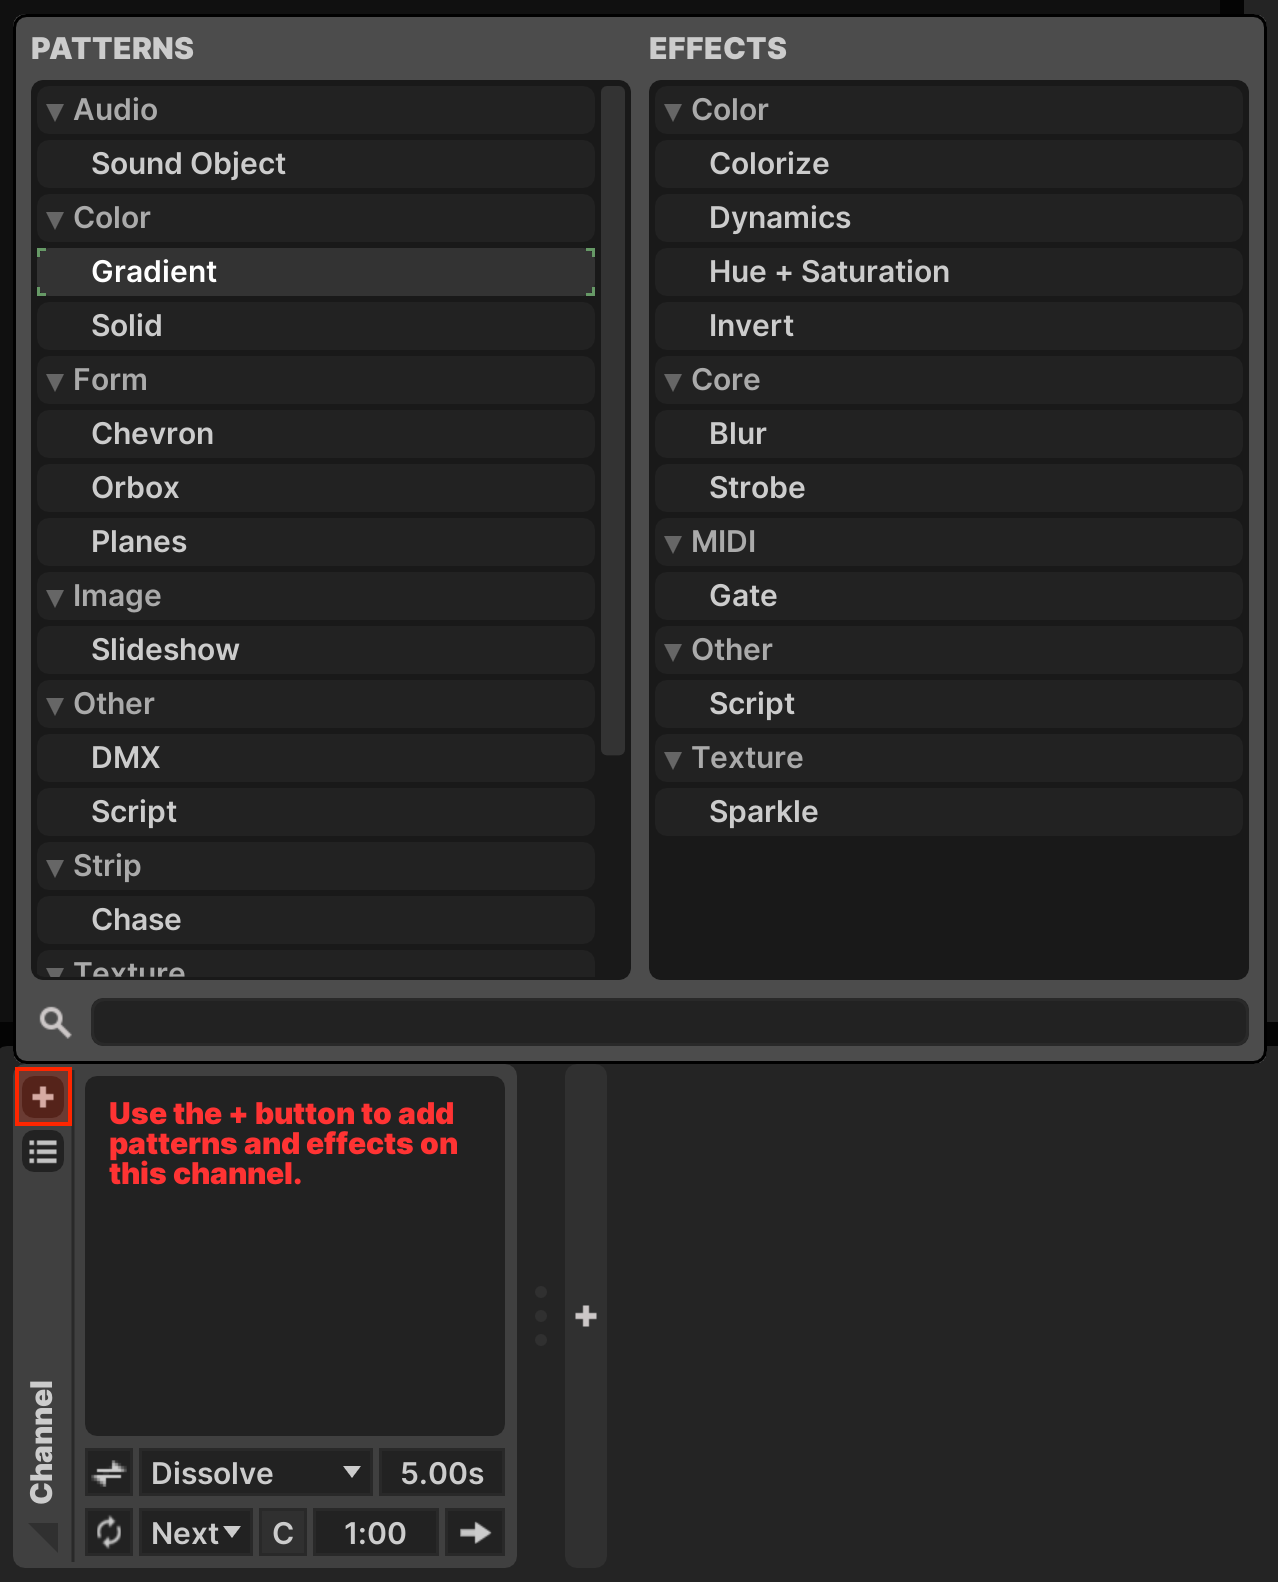
Use the button in the top left corner of the Pattern Bin to bring up the Device Chooser and add a Pattern to the channel.
When Patterns have been added, they appear as a list in the Pattern Bin. The Pattern Controls for the Focused Pattern are shown immediately to the right.
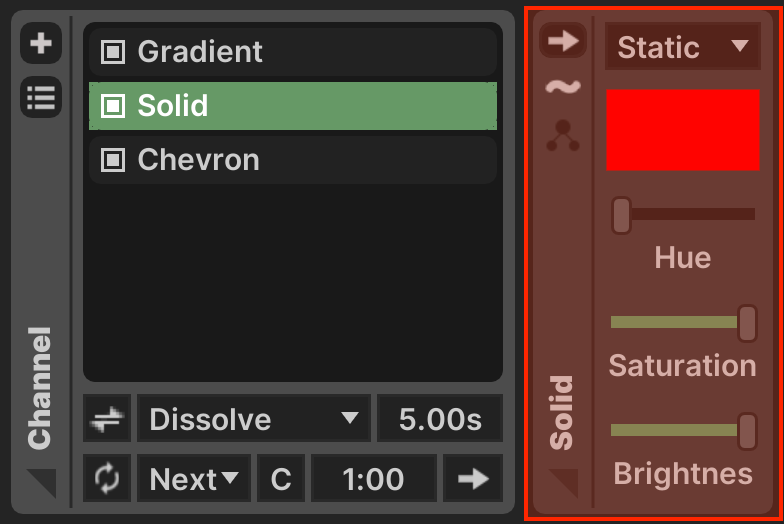
The Focused Pattern is selected by single-clicking or by pressing ↑ + ↓ when the Pattern Bin has focus. Patterns in the Pattern Bin may be renamed with ⌘R, reordered with drag-and-drop or ⌘↑ + ⌘↓, duplicated with ⌘D and deleted with DELETE.
For details on the use of specific Patterns, see Pattern Reference →
Compositing
There are two different modes by which a channel combines the output of all the Patterns in the Pattern Bin. This mode is selected using the Composite Mode button ( /
/  ) in the top-left corner.
Playlist Mode

In the default Playlist Mode, the channel displays one Active Pattern at a time, with optional transitions between two patterns when the Active Pattern changes. Changes can be performed manually or set to auto-rotate on a timer. In this mode the Enabled ![]() checkbox to the left of each pattern controls whether this pattern is eligible for auto-rotation.
checkbox to the left of each pattern controls whether this pattern is eligible for auto-rotation.
To set the Active Pattern, double-click or press RETURN on an entry in the Pattern Bin. This can also be accomplished using the Recall ![]() button in the top left corner of the Pattern Controls.
button in the top left corner of the Pattern Controls.
The Active Pattern is highlighted in green. When a transition is active, the Next Pattern is highlighted in gray and a small progress indicator is displayed in the Transition Time box.
At the bottom of the pattern bin are controls for pattern transition and auto-rotation.
- Transitions:
 Whether transitions are enabled
 - Transition Blend: Which blend mode to use for transitions (see Blend Modes →)
- Transition Time: How long transitions between patterns last
- Auto-Cycle:
 Whether automatic pattern rotation is enabled
 - Auto-Cycle Mode: How to choose the next pattern when auto-rotation occurs
- Next: Always proceed to the next eligible pattern (one with the Enabled
 checkbox active)
 - Random: Choose an eligible pattern at random each time (not repeating the current pattern)
- Next: Always proceed to the next eligible pattern (one with the Enabled
- Custom Cycle Time: Controls how long this pattern runs for before rotation
- C: Uses a shared auto-rotation time, set on this channel
- P: Uses a specific cycle time, particular to the Focused Pattern
- Cycle Time: Edits the cycle time, as selected by the previous control — also shows a progress meter when Auto-Cycle is enabled
- Trigger Pattern:
 manually triggers a pattern rotation
Note that when Transitions are enabled, explicitly recalling a Pattern for a second time completes the transition immediately.
Composite Mode

In Composite Mode, all of the patterns are rendered and blended at once, with the channel functioning as a mini-mixer. The Enabled ![]() checkbox to the left of each pattern controls whether the pattern is rendered or not. Patterns are composited from top to bottom in the Pattern Bin.
checkbox to the left of each pattern controls whether the pattern is rendered or not. Patterns are composited from top to bottom in the Pattern Bin.
At the bottom of the pattern bin are compositing controls for the Focused Pattern.
- Enabled:
 Whether the pattern is active
 - Composite Level: The level for this pattern, equivalent to a Fader on the Mixer
- Damping: Whether to damp (fade in/out) mixing of this pattern when it is toggled
- Damping Time: Time to ramp the damping envelope
- Composite Blend: Which blend mode to use for this pattern (see Blend Modes →)
Effects
Effects can be added to any type of channel and are used to process or transform an existing output. They process one of two targets:
- Pattern: The effect only processes the output of this pattern
- Channel: The effect applies to everything on the channel
Effects appear to the right of any Pattern devices in the Device Bin. They are processed in order from left-to-right.
Pattern Effects
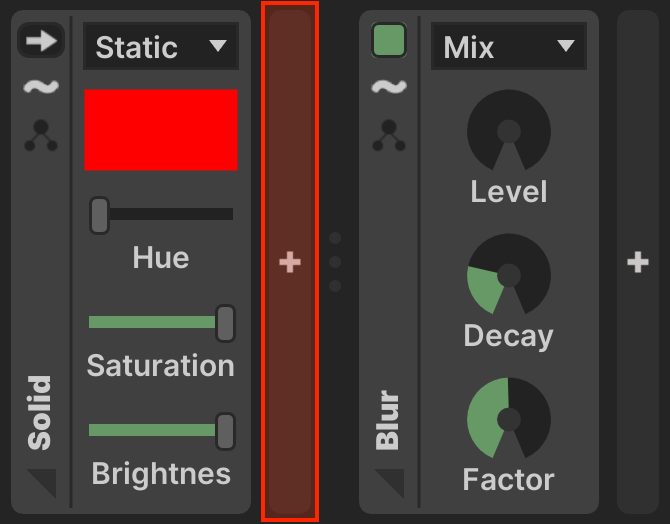
To add an effect to a specific pattern, use the strip immediately to the right of the Pattern Controls to bring up the Device Chooser, before the three-dot Effects Separator. The Effect Controls appear to the right of the Pattern Controls. Multiple Effects can be added to any single Pattern.
Channel Effects
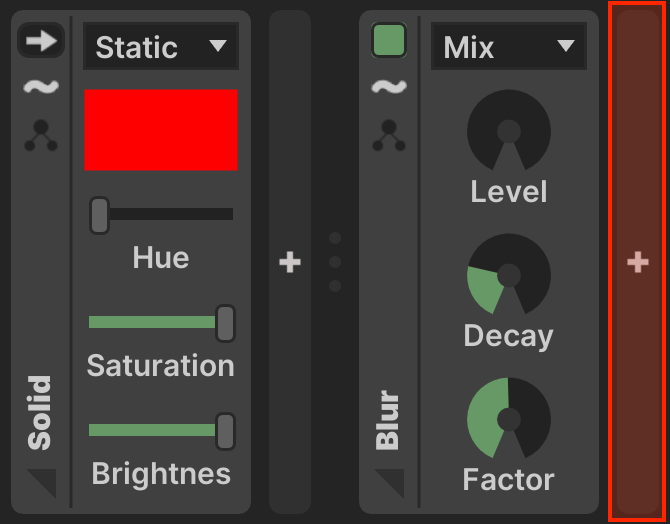
To add an effect to the channel, either use the button in the top-left corner of the Pattern Bin as shown above, or use the strip to the right of the three-dot Effects Separator in the Device Bin to bring up the Device Chooser.
Managing Effects
Effects may be reordered with drag-and-drop or ⌘← + ⌘→, duplicated with ⌘D and deleted with DELETE. Effects cannot be reordered across the Pattern and Channel effects boundary.
For details on the use of specific Effects, see Effect Reference →
Device Controls
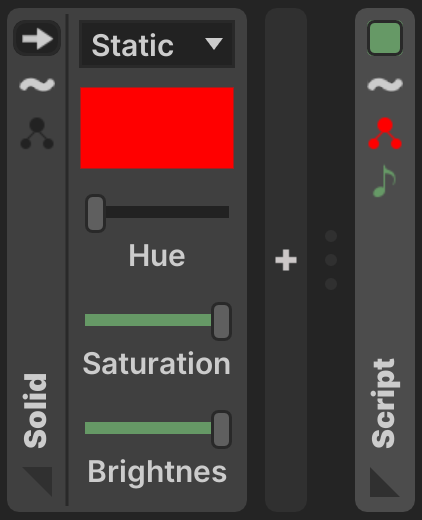
Both Patterns and Effects present a set of Device Controls. In the vertical bar on the left-hand side of the device is a common sequence of controls. On the right side is a control UI that is specific to each particular device.
- Recall: for Patterns only, make this the Active Pattern when in Playlist Mode
- Enabled: Toggle for Effects only, whether the Effect is active
- Modulation:
 Expands the Device Modulation section
 - View:
 Selector chooses a target View for this device — when active this device only processes points contained in the given view
 - MIDI:
 Only for devices which support MIDI, configures event filter
 - Label: Displays the device label
- Expand/Collapse: Triangle indicator closes/expands the Device Controls UI
The Device Controls can also be quickly collapsed/expanded using SPACE.
A device can be manually reloaded in-place using ⇧⌘R. Note that this may create visual discontinuity, since any randomness or timing-based algorithms in the device will be reset.
Presets
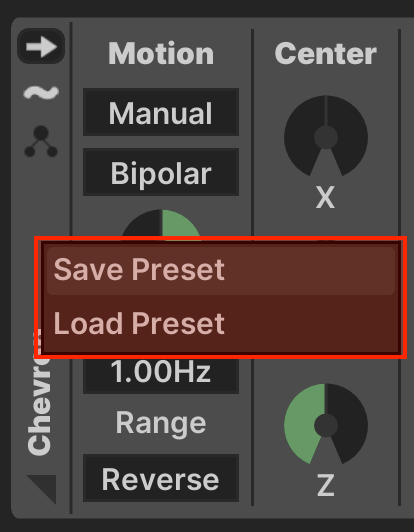
Presets can be saved and loaded for both Pattern and Effect devices. These are stored in a subdirectory under ~/Chromatik/Presets/ with the .lxd file extension.
A Preset contains all of the device's parameter values as well as all of the Device Modulation settings.
To save or load a Preset, right-click on the device bar to open a context menu with these operations.