Application Overview
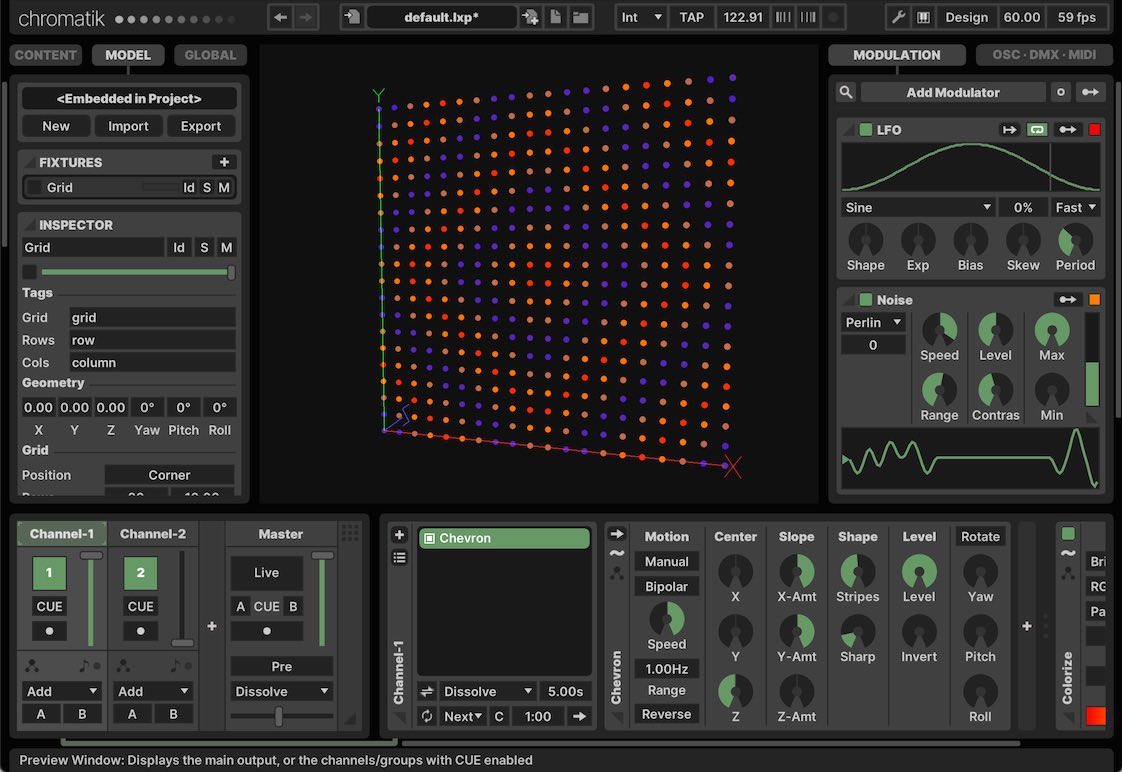
The Chromatik UI is divided into a number of top-level sections that contain all major functionality. This chapter offers a quick overview of these sections, referencing later guide chapters for greater detail when available.
Toolbar
The Toolbar is a horizontal strip across the top of the application, divided into a number of segments.
Edit
The Edit segment contains buttons for ⌘Z and ⇧⌘Z operations.
Project
The Project segment indicates the currently loaded file. Chromatik projects are stored in files using the .lxp extension. Standard file operation buttons are available.
- ⌘S
- ⇧⌘S
- ⌘O
Tempo
The Tempo segment offers control over the musical clock source.
- Clock source dropdown menu
- Int: Internal clock
- MIDI: Clock from MIDI (see MIDI Beat Clock Sync →)
- OSC: Clock from OSC input (see OSC Beat Sync →)
- button and numeric entry box for tempo specification in beats per minute
- and buttons for temporary adjustment while synchronizing manually to an outside source
- toggle button to enable/disable tempo trigger modulation, which pulses on the beat when active
Settings
The Settings segment provides a number of utility controls.
- Preferences ⌘ , menu button
- Computer MIDI Keyboard ⌘K toggle button
- Design / Performance Mode ⌘P toggle button
- FPS entry box and a real-time indicator of achieved FPS (Frames Per Second) and CPU usage
Content
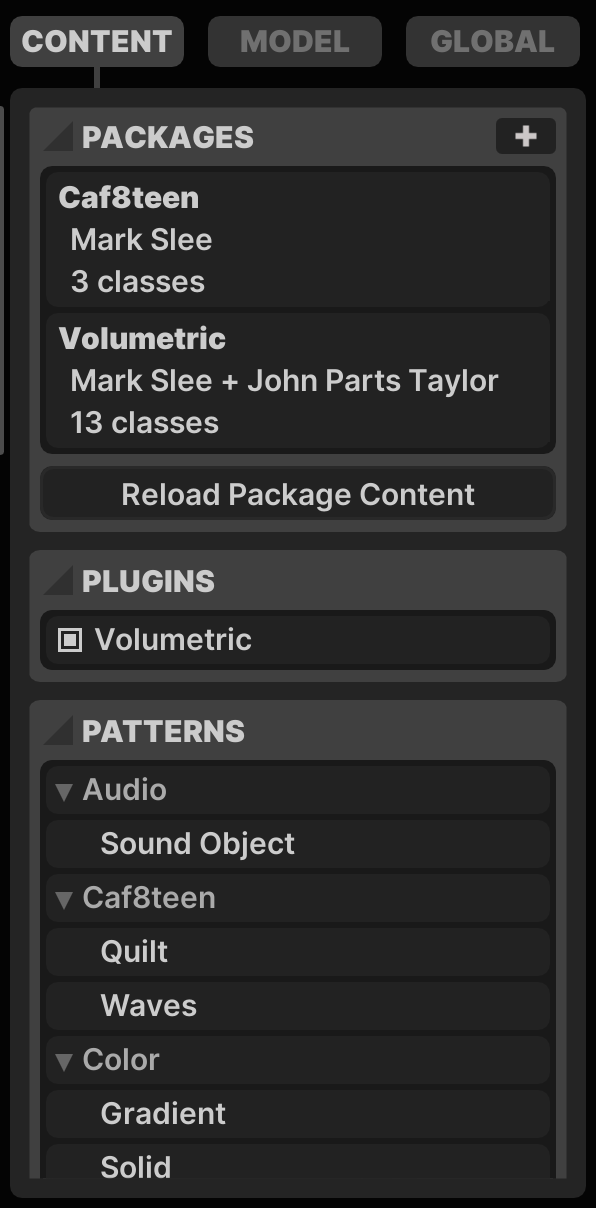
The left-pane CONTENT tab shows all the content available to the Chromatik runtime in four sections.
- PACKAGES: any loaded packages, use the button to import
- PLUGINS: extension plugins, if available
- PATTERNS: all available pattern devices
- EFFECTS: all available effect devices
Model
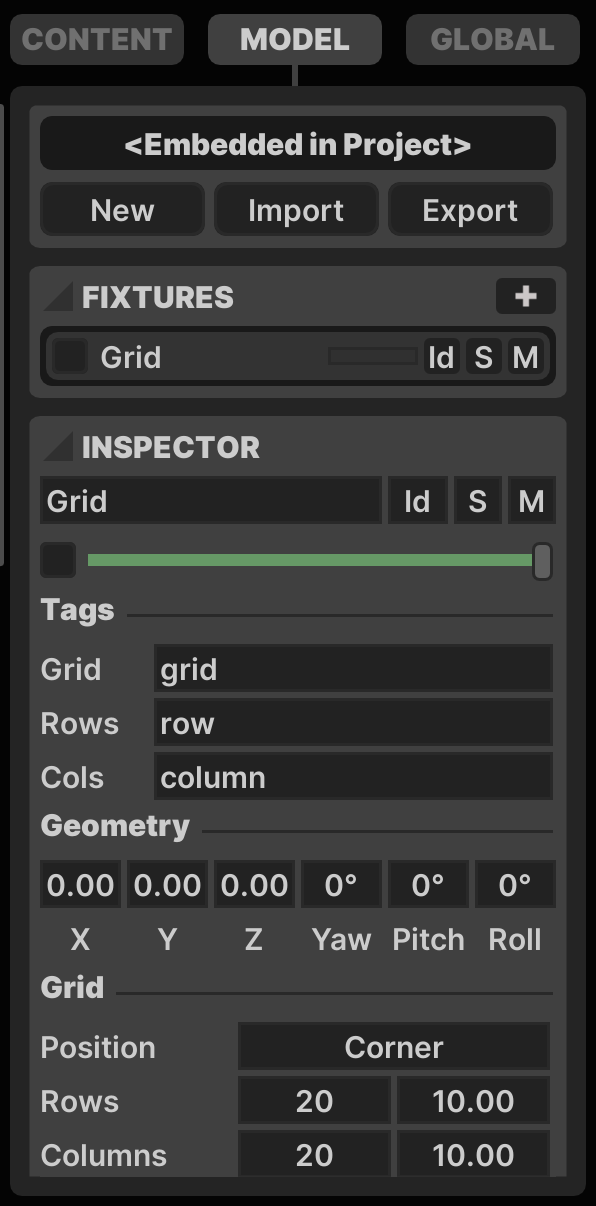
The left-pane MODEL tab is used to construct a lighting model.
- FIXTURES: Specify a list of lighting fixtures that make up your overall model
- INSPECTOR: Orient lighting fixtures in 3D space, specify output protocols and addressing for real-world hardware
- VIEWS: Define custom views of portions of the overall model, using tags and specifiers
- OUTPUT: Make global output adjustments like Brightness, White Point, and Gamma Correction
- CAMERA: Specify how the model simulation is rendered in the Preview Window
These functions are all detailed in Model Definition →
Global

The left-pane GLOBAL tab contains a number of global animation controls.
- AUDIO: Configure live audio input, see Audio →
- COLOR PALETTE: Manage a global set of color swatches, see Color Palette →
- SNAPSHOTS: Store and recall snapshots of the project state, see Snapshots →
Preview Window
The Preview Window renders a 3D simulation of the light animation in the center of the UI.
By default, the preview window renders the full model using the output colors generated by the Mixer. However, the Cue feature on each individual Channel or the Master channel Crossfader Cue setting may be used to tell the Preview Window to show something different than the master output. This is similar to the Cue function on a typical DJ mixer, which enables a DJ to preview an audio channel via headphones without impacting what the audience hears (see Cueing →).
The Preview Mode control on the Master channel strip offers Pre/Post options which control whether the Preview Window's simulation is impacted by the master fader. When working with very bright lighting fixtures, it is often desirable to dim the hardware output while maintaining a full-brightness simulation on the Preview Window.
Preview Settings
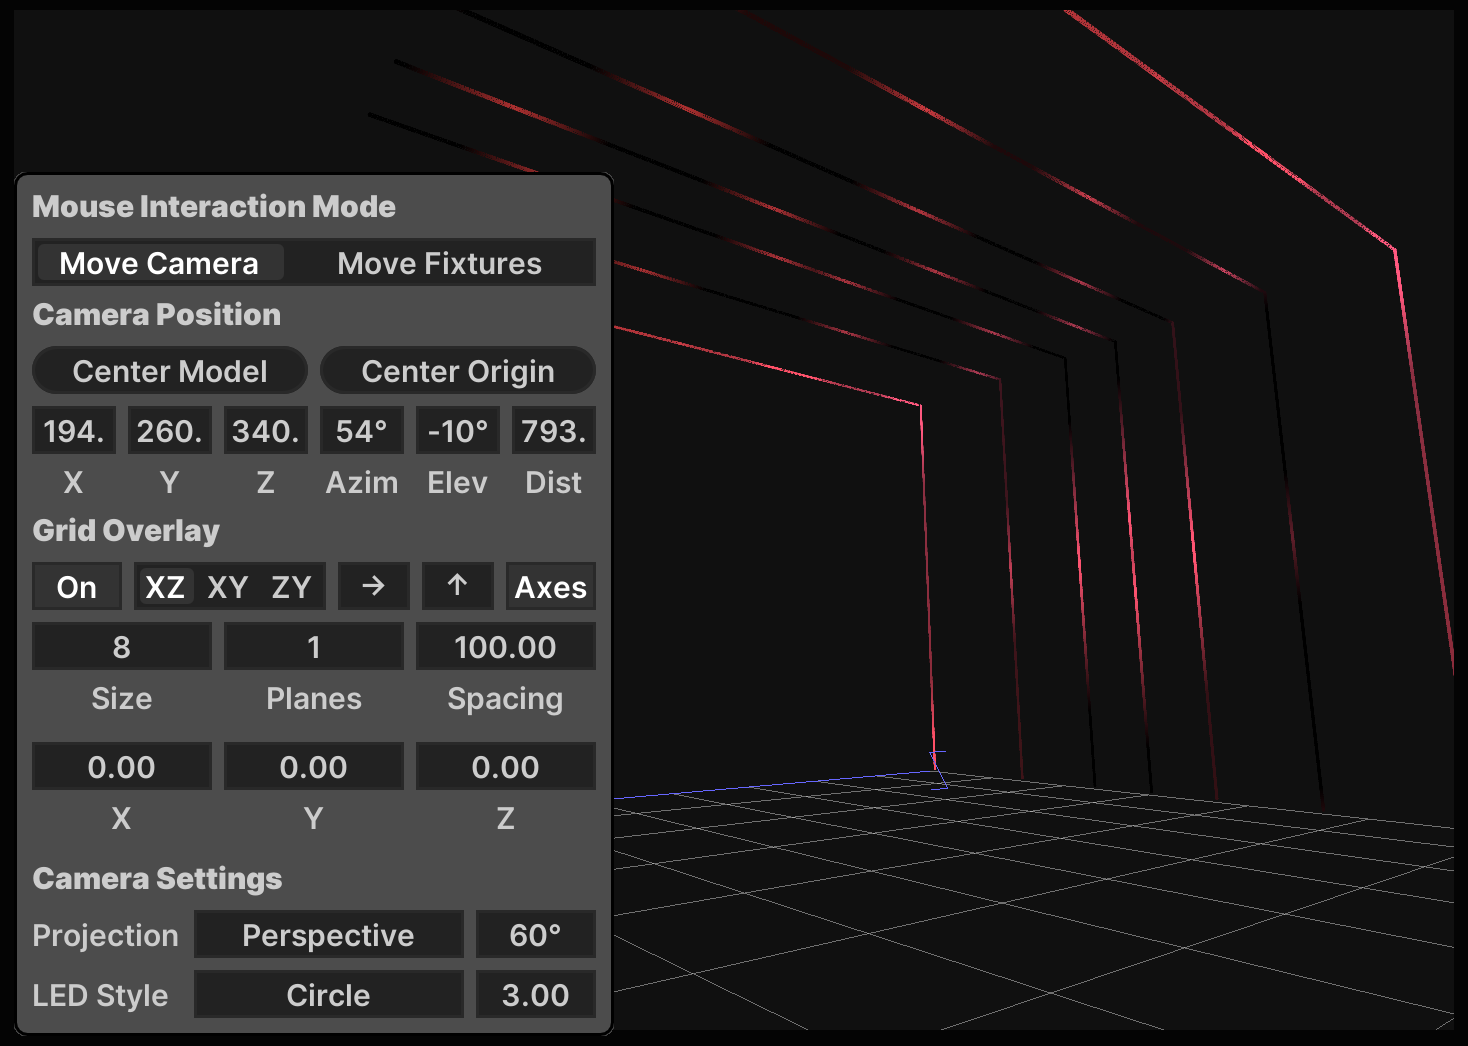
Right-click the Preview Window to open a context menu with configuration options for the 3D display.
- Mouse Interaction Mode ⇧⌘F
- Move Camera: Clicking and dragging with the mouse reorients the view
- Move Fixtures: Clicking and dragging with the mouse moves selected fixtures
- Camera Position
- : centers the view on the center of the model
- : centers the view on absolute origin
(0,0,0) - X / Y / Z: Center position of the scene
- Azim: Rotation of the scene about the vertical axis
- Elev: Tilt of the scene above or below the horizontal plane
- Dist: Distance from the camera to center of the scene
- Grid Overlay ⇧⌘G
- : Render gridlines in the scene
- : Which plane the gridlines are rendered on
- Size: The number of boxes drawn on each side of the grid
- Planes: How many stacked planes of gridlines to render
- Spacing: Spacing between gridlines
- X / Y / Z: Reference point of the grid origin
- : Render absolute X/Y/Z axes from the origin
- Camera Settings
- Projection:
PerspectiveorOrthographicview - Perspective: Field-of-view angle for
Perspectiveprojection - LED Style: A choice of rendering style for each simulated LED
- Point Size: Size of individual point rendering
- Projection:
Mouse Interaction
Clicking and dragging directly on the Preview Window updates the camera view or modifies the position of fixtures, depending upon the current Mouse Interaction Mode. When in Move Fixtures mode there is a transparent red overlay across the window.
- Move Camera mode
- Reorient the camera's position (modifies Azim and Elev)
- ⇧ Zoom in/out with vertical dragging
- ⌘ Translate the camera position
- Move Fixtures mode
- Translate selected fixtures laterally in the camera view plane
- ⇧ Translate fixtures towards/away from the camera
- ⌘ Rotate the selected fixtures (modifies fixture Yaw and Pitch)
- ⇧⌘ Rotate the camera view rather than moving fixtures
Modulation
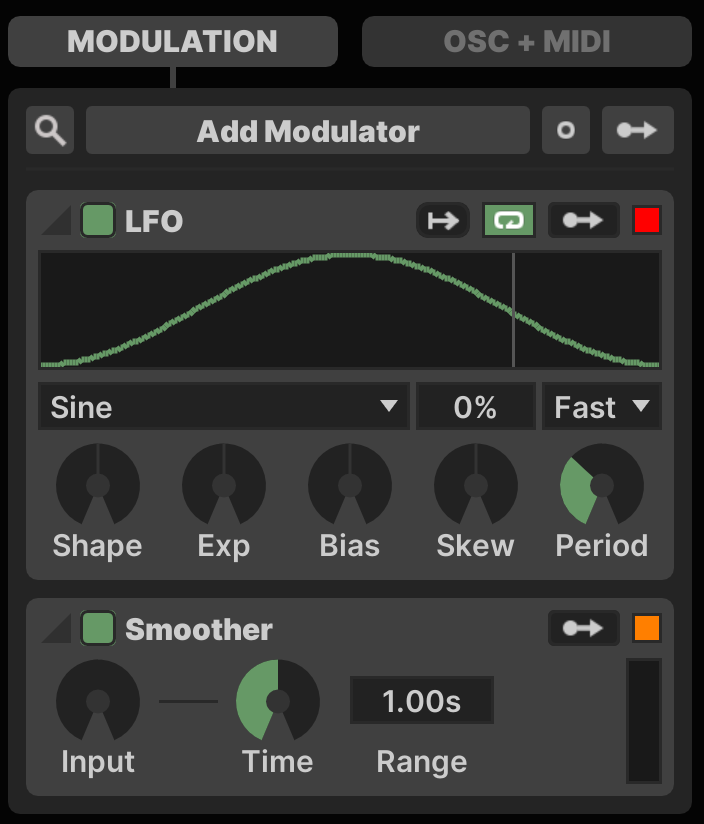
The right-pane MODULATION tab is used to manage a set of global modulation tools and mappings. These functions are covered in greater detail in Modulation →
OSC · DMX · MIDI
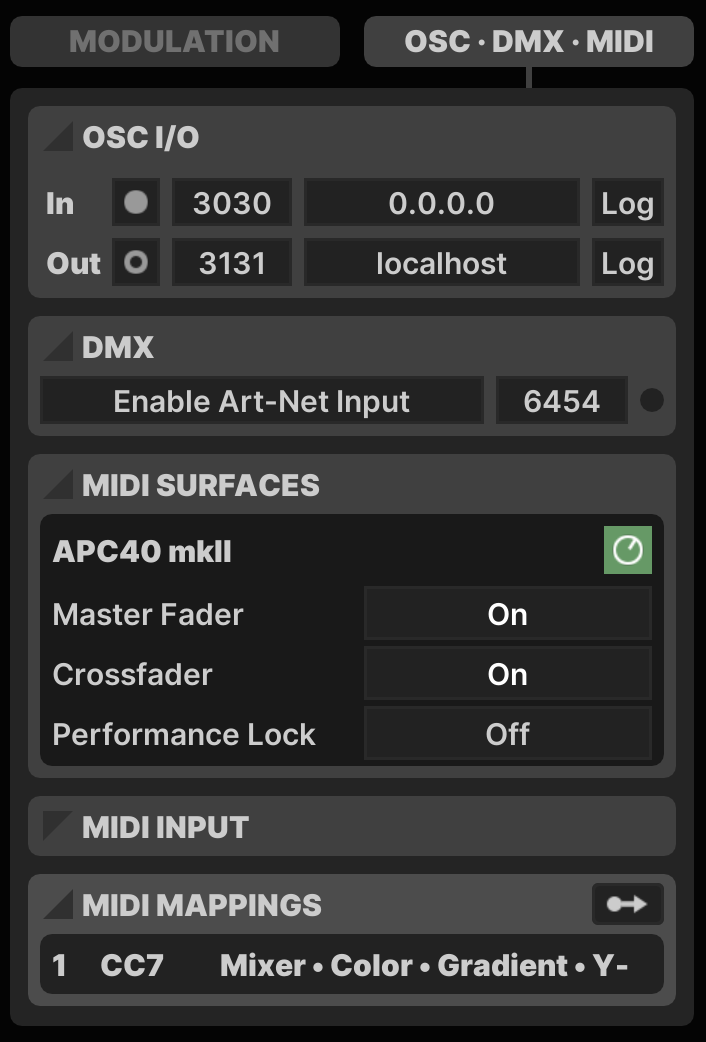
The right-pane OSC · DMX · MIDI tab is used to manage connections to external control sources.
- OSC I/O: Communication via Open Sound Control (See OSC →)
- DMX: Input from DMX devices via Art-Net (See DMX →)
- MIDI SURFACES: Manage MIDI control surface devices
- MIDI INPUT: Manage all MIDI input devices
- MIDI MAPPINGS: Create custom MIDI parameter mappings
For details on MIDI sections, see MIDI →
Mixer + Device Bin
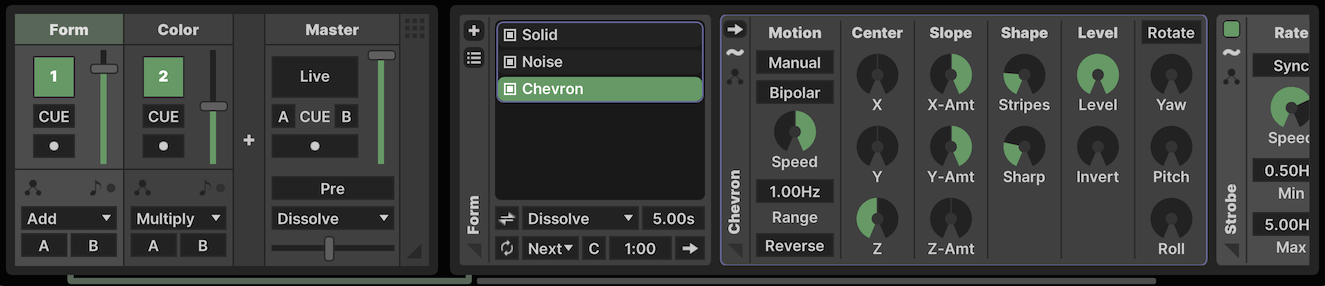
The Bottom Tray area of the UI holds the Mixer and Device Bin. These work together side-by-side, managing the core controls for Chromatik's light animation devices.
Mixer
The Mixer is located on the left-hand side of the Bottom Tray and is modeled after a DJ-style audio mixer. Channels are blended from left-to-right, with optional grouping and reordering. Each channel strip offers a set of core controls.
- Enabled: Whether the channel is active
- Fader: Degree to which this channel is blended
- Cue: Show just this channel in the Preview Window, without affecting master output
- Arm: Whether this channel is armed for automation recording
- View: Optionally selects a sub-view of the model for this channel (see Views →)
- MIDI Filter: Configures how MIDI events are routed to this channel
- Blend Mode: Specifies what type of compmositing this channel uses
- Crossfader Assignment: + buttons assign this channel to a crossfader
The Master channel offers additional controls.
- Live: Whether real network output is sent
- Fader: Controls master output level, which may also impact the Preview Window
- Crossfader Cue: Buttons to preview the A or B crossfader side only
- Arm: Whether this channel is armed for automation recording
- Preview Mode: Whether UI rendering is
Pre/Postthe master fader - Crossfader Blend: How to composite the A and B crossfader groups
- Crossfader: Blends between the A and B crossfader groups
Channels may be reordered using ⌘← + ⌘→ or by dragging and dropping. Modifier keys can be held while clicking to select multiple channels ⌘ or a range of channels ⇧.
When multiple channels are selected, a group may be formed using ⌘G, or by using the context menu available by right-clicking the channel header. All channels other than Master are renamable with ⌘R or by pressing RETURN when the channel name has focus.
When working with many channels, a condensed view of the Mixer may be toggled by clicking the triangle in the bottom-right or pressing ⇧<.
This functionality is covered in more detail in The Mixer →
Device Bin
The Device Bin sits to the right of the Mixer. Each Channel has its own Device Bin, and a line underneath the Mixer and Device Bin visually connects the two, indicating which Channel currently has focus.
The Device Bin can hold Patterns and Effects. Normal channels have a Pattern Bin that holds all the Pattern devices loaded on this channel (note that Group and Master channels do not have a Pattern Bin). To the right are Effects, which may be assigned to a particular Pattern or to the Channel as a whole. Devices are added using the button on the top of the strip which display's the focused channel name on the left edge of the Device Bin.
Each Pattern or Effect device presents its own Device UI with controls available to modify the function of the device. Devices are shown in the order of processing from left-to-right.
Pattern devices in the Pattern Bin may be renamed with ⌘R, duplicated with ⌘D, deleted with DELETE and reordered with ⌘↑ + ⌘↓.
Effect devices may be duplicated with ⌘D, deleted with DELETE, and reordered with ⌘← + ⌘→.
Help Bar
Across the bottom of the application is a contextual Help Bar which displays a description of any parameter or function that the mouse is hovering over, including such helpful information as an OSC path to the parameter, when one exists. Other useful messages may also appear here, such as confirmation that a file has been saved.
Visibility of the Help Bar can be toggled with ⇧?.